Difference between revisions of "GitLab server"
| Line 135: | Line 135: | ||
The second parameter is the "branch" you want to commit to. In this case we create a default branch called "master". We'll worry about branches later. | The second parameter is the "branch" you want to commit to. In this case we create a default branch called "master". We'll worry about branches later. | ||
| + | |||
| + | '''Important''': for now you will need to retype your login and password every time you want to push changes to the central repository. We'll get around this later using the SHH method instead of HTTPS. | ||
| + | |||
| + | === Has it worked? === | ||
| + | |||
=== Summary of important commands === | === Summary of important commands === | ||
Revision as of 12:56, 16 February 2015
GitLab server
The University provides every student with a fully working Version Control system called GitLab:
Please note that you should only use this server to store files related to University coursework. Personal or word related files should not be stored on this server.
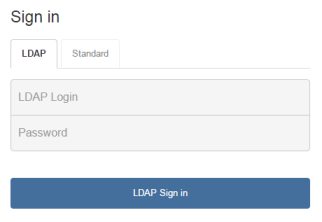
Signing in
You can sign in using your usual university credentials. Make sure that you select the "LDAP" tab on the "Sign in" screen:
Creating a project
Your next step is to create a "Project" that will contain your work. Click on the "+ New Project" button.

And populate the following fields:
- Project Name
- Description
- Visibility Level
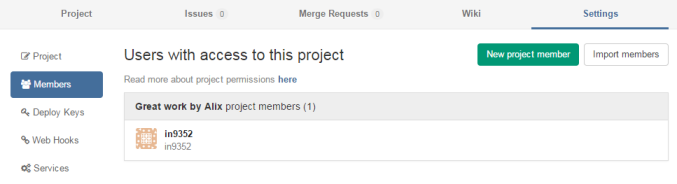
Important: The Visibility Level should be set to "Private" for all assessment-related work. Any other Visibility Level would allow other students to look at and clone your work, which equates to Collusion under the University's Academic Misconduct regulations.
Set the Project's Visibility level to "Private" and then manually invite new project members, via the Project's settings:
Creating your first repository
When visiting your project's homepage you are presented with some command line Git code that you should use to create your first repository. Please note that you get 2 access options:
- SSH
- HTTPS
We'll look that HTTPS for now, so click the "HTTPS" button near the top.
Git commands
Your project's homepage should contain commands similars to these ones:
Git global setup
git config --global user.name "in9352"
git config --global user.email "alix.bergeret@wlv.ac.uk"
Create a new repository
mkdir great-work-by-alix
cd great-work-by-alix
git init
touch README.md
git add README.md
git commit -m "first commit"
git remote add origin git@fsegitlab.wlv.ac.uk:in9352/great-work-by-alix.git
git push -u origin master
Push an existing Git repository
cd existing_git_repo
git remote add origin https://fsegitlab.wlv.ac.uk/in9352/great-work-by-alix.git
git push -u origin master
In order to run the code above you have 3 options:
- [Windows] Run Git Bash, a Git client installed in all MI labs
- [Windows] SSH into mi-linux.wlv.ac.uk using an SSH client such as Putty
- [Linux] Boot under Linux, and open a Command window.
Git commands - details
Let's look at each command in more details:
git config --global user.name "in9352"
git config --global user.email "alix.bergeret@wlv.ac.uk"
The commands above simply set some global settings (your user name and email address) that are required for this process.
If you omit these you will get the following warning later on:
- "Your name and email address were configured automatically based on your username and hostname. Please check that they are accurate. You can suppress this message by setting them explicitly."
mkdir great-work-by-alix
cd great-work-by-alix
Well, nothing too difficult here, we simply create an empty folder and move into it. Note that you may wish to move into an existing folder that already contains files instead!
git init
Here is the first important command. git init creates an empty Git repository. If the command is successful you should get a message stating "Initialized empty Git repository in ...". This has created a hidden ".git" folder that you can see by running the command "ls -la".
touch README.md
This command simply creates an empty test file called "README.md". If you already have files in your folder (e.g. PHP files), then you don't need to do this.
git add README.md
Second important command. git add adds a file to the repository's index. We can run this command to add our dummy "README.md" file, or any existing files you may have.
git commit -m "first commit"
Third important command! git commit records all changes to the local repository. This should be run regularly when your code is in a working, stable state. Important: for now your changes were only committing to the local repository. To commit them to the central repository you'll need the "push" command below.
Important: It is always considered good practice to type in a comment when committing code to a repository, so that other developers can read about your update. When using the command line this is done using the -m argument, as demonstrated above.
git remote add origin https://fsegitlab.wlv.ac.uk/in9352/great-work-by-alix.git
This is an optional command that create a "remote", aka an alias (or shortcut) to your lengthy repository's full address. In this case we name it "origin". So from now on we can simply refer to "origin" when working with this repository (see below!)
Note: your repository's address should contain "https://". If it doesn't then your forgot to press the "HTTPS" button earlier.
git push -u origin master
And here is the final important command! git push commits all local changes to the central repository, i.e. "origin", definied in the previous step.
The second parameter is the "branch" you want to commit to. In this case we create a default branch called "master". We'll worry about branches later.
Important: for now you will need to retype your login and password every time you want to push changes to the central repository. We'll get around this later using the SHH method instead of HTTPS.
Has it worked?
Summary of important commands
Whether you use an old fashion command line Git Client or a fancy IDE, it is crucial to understand the process and the various steps required when working with git:
- git init: Creates an empty Git repository
- git add: Adds a file to the repository's index
- git commit: Commits changes to local repository
- git push: Commits changes to remote repository