Working with GitLab Issues, Milestones and Labels
Main Page >> GitLab server >> 5. Working with GitLab Issues, Milestones and Labels
Adding Issues
"Bug tracking" in GitLab is done via the "Issues" tab of your project.

Let's create a first issue. Simply press the "+ New Issue" button located in the top-right hand corner, and fill in the following fields:
- Title: a brief description of the problem
- Description: a more in-depth explanation of the nature of the problem, including error messages, details on how to replicate the issue etc.
- Assigned to: you may decide to allocate the issue to a developer, or leave the field blank and let developers allocated the issue to themselves later on.
- Milestone: We will look at Milestones shortly, please leave blank for now.
- Labels: We will look at Labels shortly, please leave blank for now.
Press the "Submit new issue" button.
You are redirected to your newly created issue. The following actions are possible:
- Editing the issue
- Closing the issue (if it is resolved)
- Adding comments (to discuss the issue with team members - see further section)
- Going back to the list of issues.
Task
Try creating a couple more issues, and then go back to the list of issues, which should look similar to this:
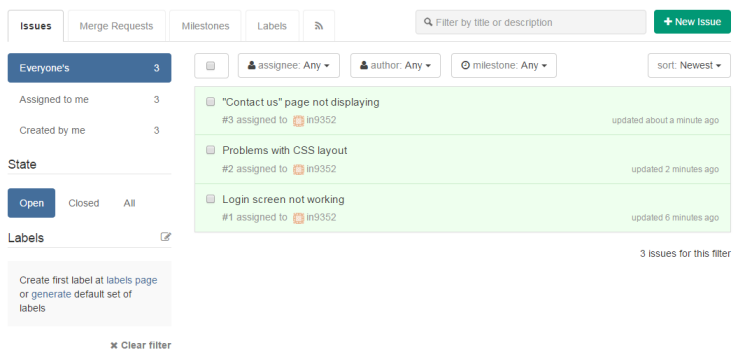
Notice that you can filter issues by:
- Assignee (the person the issue is assigned to)
- Author (the person who created the issue)
- State (open or closed)
- Title or description (via the search box)
- Label
- Milestone
The last 2 need to be set-up first, so let's do that now.
Creating Milestones
As the name suggests, milestones are key stages in your projects, e.g. an important demo to the client, or the end of the current Scrum sprint.
Let's create 2 milestones called "Sprint 1 review" and "Sprint 2 review":
- Click on the "Milestones" tab at the top
- Clien on the "+ New milestone" button
- Fill in the following fields:
- Title: "Sprint 1 review"
- Description: Anything you want
- Pick a suitable date from the calendar
- Press the "Create milestone" button
Repeat the above for "Sprint 2 review". You should now see your 2 milestones in the list:

Creating Labels
You can also use "labels" to categorize your issues. Labels are keywords, or tags, and can be anything you like.
You can create your own labels, or generate a set of default labels. Let's do that for now:
- Click on the "Labels" tab at the top.
- Click on the "Generate default set of labels" hyperlink.
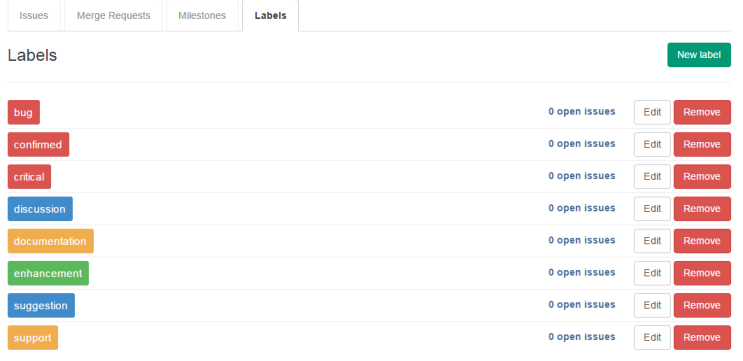
You should see the default labels listed:
Allocating Milestones and Labels to issues
Now let's edit our existing issues to allocate them to milestones and labels:
- Click on the "Issues" tab
- Clien on the "Edit" button next to each issue
- Choose a suitable milestone and label
- Click the "Save changes" button.
I also created a new issue. This is what my list of issues now looks like:
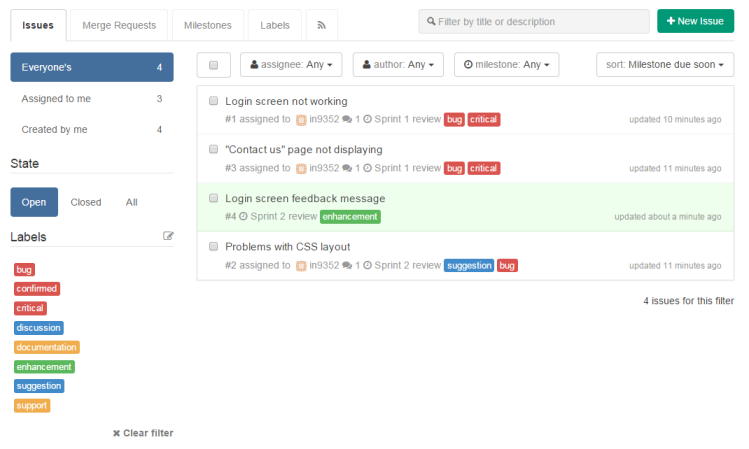
Notice:
- The milestone now appears next to each issue ("Sprint 1 review" or "Sprint 2 review)
- The relevant labels are now displayed next to each issue
- You can now sort issues by milestone. In this example I am displaying all issues related to Sprint 1 first.
- You can now filter by milestone and labels, e.g. only display "critical" issues for "sprint 1" milestone.
Commenting on and closing issues
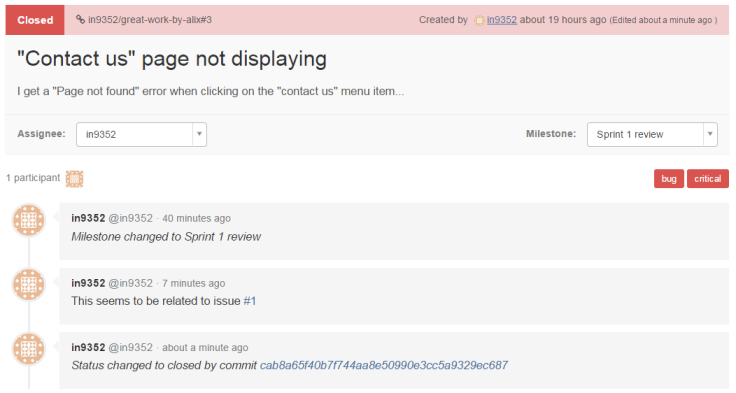
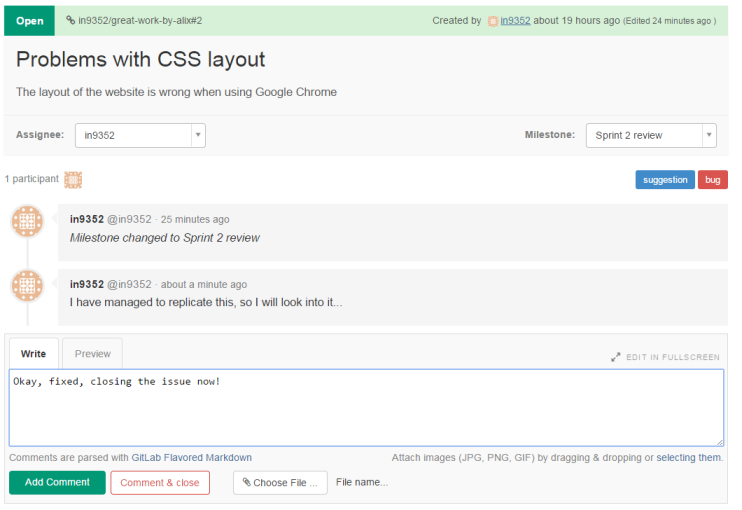
When clicking on a specific issue in the list, you are presented with a more detailed account of the issue. You can also post comments and attach files related to this issue. This should be used by team members to discuss the details of the problem, possible solutions etc.
When the issues has been resolved, it should be closed. This can be done from the list of issues, or when posting a comment. In this example I posted a comment and pressed the "Comment and close" button.
References to other issues
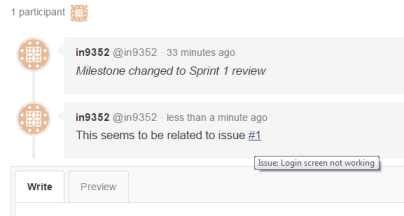
If you mention an issue number (e.g. #1) in your comment, a link to that issue will automatically be created, for example:
Progress towards milestones
Once issues have been allocated to milestones, your list of milestones will show you the progress made towards each milestone, i.e. the %age if issues closed. This is a good way to keep track of progress and outstanding work.

Closing issues when committing code
When you commit code with a message starting with 'Fixes #1' or 'Closes #1' and push it to master GitLab will close the issue you are referring to.
For example if I run the following git commands:
git commit -m "Fixes #3"
git push https://fsegitlab.wlv.ac.uk/in9352/great-work-by-alix.git master
Issues #3 is closed automatically, and the following message added:
