Working with GitLab Issues, Milestones and Labels
Main Page >> GitLab server >> 5. Working with GitLab Issues, Milestones and Labels
"Big tracking" in GitLab is done via the "Issues" tab of your project.
Adding Issues
Let's create a first issue. Simply press the "+ New Issue" button located in the top-right hand corner, and fill in the following fields:
- Title: a brief description of the problem
- Description: a more in-depth explanation of the nature of the problem, including error messages, details on how to replicate the issue etc.
- Assigned to: you may decide to allocate the issue to a developer, or leave the field blank and let developers allocated the issue to themselves later on.
- Milestone: We will look at Milestones shortly, please leave blank for now.
- Labels: We will look at Labels shortly, please leave blank for now.
Press the "Submit new issue" button.
You are redirected to your newly created issue. The following actions are possible:
- Editing the issue
- Closing the issue (if it is resolved)
- Adding comments (to discuss the issue with team members)
- Going back to the list of issues.
Task
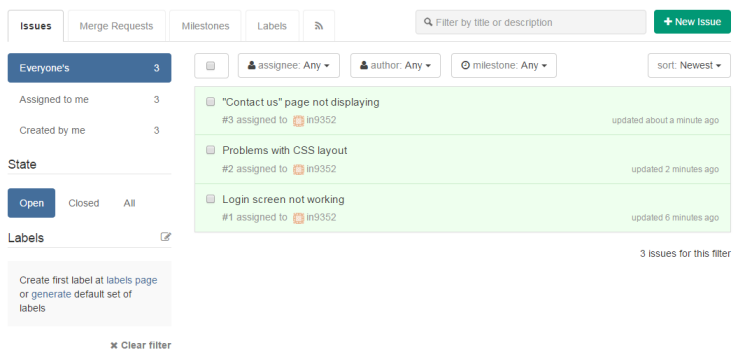
Try creating a couple more issues, and then go back to the list of issues, which should look similar to this:

Notice that you can filter issues by:
- Assignee (the person the issue is assigned to)
- Author (the person who created the issue)
- State (open or closed)
- Label
- Milestone
The last 2 need to be set-up first, so let's do that now.
Using Milestones
As the name suggests, milestones are key stages in your projects, e.g. an important demo to the client, or the end of the current Scrum sprint.
Let's create 2 milestones called "Sprint 1 review" and "Sprint 2 review":
- Click on the "Milestones" tab at the top
- Clien on the "+ New milestone" button
- Fill in the following fields:
- Title: "Sprint 1 review"
- Description
- Pick a suitable date from the calendar